How to use the Geolocation API in a React Native app
The Geolocation API provides various methods that are commonly used in web applications, but it is also a powerful tool for mobile development. Ride-sharing apps like Uber, mapping applications like Google Maps, and location features in social media apps like Instagram all rely on this API. React Native extends the Geolocation Web specification, making its capabilities available to mobile developers.
This API includes methods such as getCurrentPosition to fetch the device's current location and watchPosition to subscribe to location updates, both of which are available as polyfills in React Native. This tutorial will also cover the implementation of real-time user permissions for location access, a process that can sometimes be complex in react-native-cli projects.
What are we building?
This tutorial demonstrates how to use basic methods from the Geolocation API to build a complete weather application in React Native, initialized using the react-native command-line interface. The final application will consume weather data from a third-party API and present it in a simple, clean user interface.
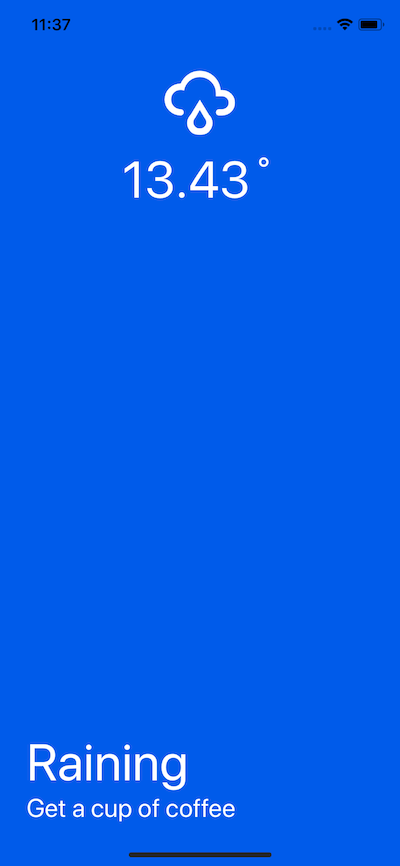
Table of Contents
- Getting Started with
react-native-cli - Accessing the Geolocation API
- Setting Permissions for iOS and Android
- Building the Weather App: First Steps
- The Loading Component
- Weather Screen
- Fetching the Data
- Adding Dynamic Weather Conditions
- Conclusion
Prerequisites
To follow this tutorial, please ensure you have the following installed on your local development environment:
- Node.js (>=
8.x.x) with npm or yarn. react-native-cli(>=2.0.1). You can install it globally usingnpm install -g react-native-cli.
Please note that this tutorial uses an iOS simulator for demonstration purposes.
Getting Started
First, initialize a new React Native project by running the following command in your terminal:
react-native init geoWeatherApp
Navigate into the newly created project directory and run the application to ensure the setup is correct.
cd geoWeatherApp
npm run start

# In a second terminal window
react-native run-ios
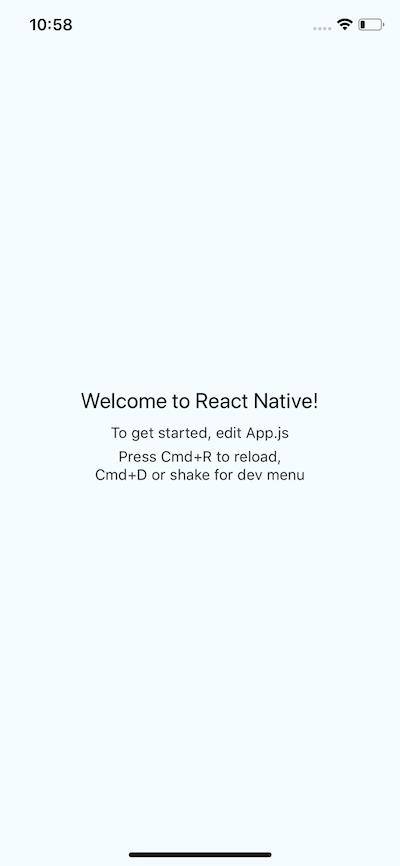
The run-ios command builds the application for the iOS platform. You can use react-native run-android for Android emulation. The default welcome screen should appear if the setup is successful.
Accessing the Geolocation API
The Geolocation API is available in React Native as a global navigator.geolocation object, just like in web browsers, and does not require any import statements.
For this demonstration, we will use the getCurrentPosition method. This method requests a user's location and accepts three arguments: a success callback, an error callback, and an optional configuration object.
Modify the App.js file with the following code:
// App.js
import React, { Component } from 'react';
import { Alert, StyleSheet, Text, View, TouchableOpacity } from 'react-native';

export default class App extends Component {
  state = {
    location: null
  };

  findCoordinates = () => {
    navigator.geolocation.getCurrentPosition(
      position => {
        const location = JSON.stringify(position);
        this.setState({ location });
      },
      error => Alert.alert(error.message),
      { enableHighAccuracy: true, timeout: 20000, maximumAge: 1000 }
    );
  };

  render() {
    return (
      <View style={styles.container}>
        <TouchableOpacity onPress={this.findCoordinates}>
          <Text style={styles.welcome}>Find My Coords?</Text>
          <Text>Location: {this.state.location}</Text>
        </TouchableOpacity>
      </View>
    );
  }
}

const styles = StyleSheet.create({
  container: {
    flex: 1,
    justifyContent: 'center',
    alignItems: 'center',
    backgroundColor: '#F5FCFF'
  },
  welcome: {
    fontSize: 20,
    textAlign: 'center',
    margin: 10
  }
});
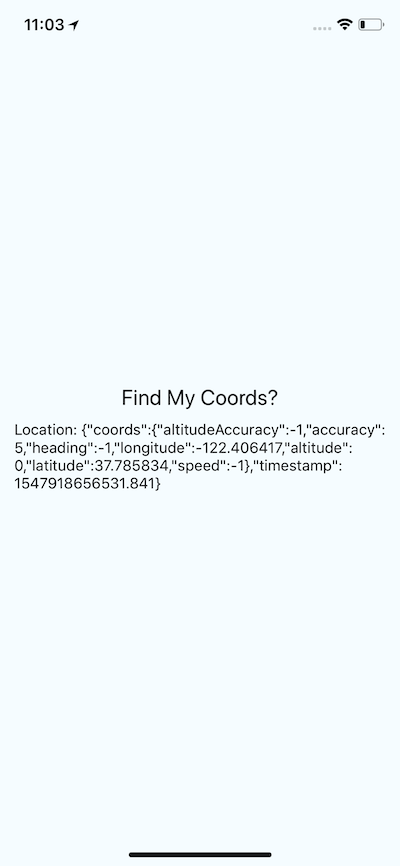
The findCoordinates function contains the logic for fetching the device's current location. The local state is used to store and display the position object returned by the API.

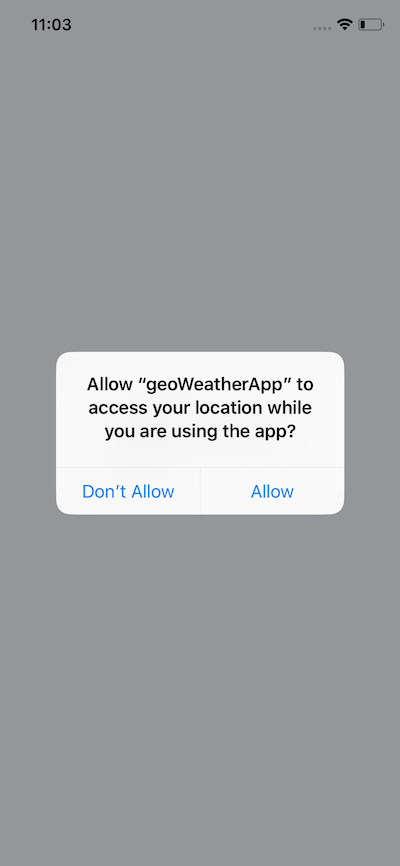
When you press the "Find My Coords?" text, the app will request permission to access the location.
Once permission is granted, the app will fetch the location, store it in the state, and display the result.
Setting Permissions for iOS and Android
For iOS, geolocation is enabled by default in projects created with react-native-cli. You only need to ensure the NSLocationWhenInUseUsageDescription key is present in the ios/geoWeatherApp/Info.plist file, which is usually added by default.
For Android, you must add the following permission to the android/app/src/main/AndroidManifest.xml file:
<uses-permission android:name="android.permission.ACCESS_FINE_LOCATION" />
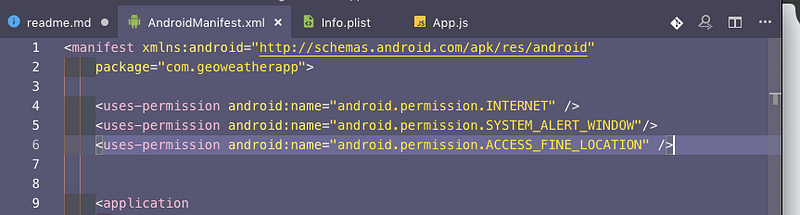
After adding the permission, running the app on an Android emulator will produce a similar permission prompt.
Building the Weather App
Now, we will build upon this foundation to create a complete weather application using the OpenWeatherMap API. You will need to sign up for a free account to obtain an API key.
The application will use the device's geolocation coordinates to fetch weather data for the user's current location.
Start by clearing the App.js file and adding a basic structure:
// App.js
import React from 'react';
import { StyleSheet, Text, View } from 'react-native';

export default class App extends React.Component {
  render() {
    return (
      <View style={styles.container}>
        <Text>Minimalist Weather App</Text>
      </View>
    );
  }
}

const styles = StyleSheet.create({
  container: {
    flex: 1,
    backgroundColor: '#fff',
    alignItems: 'center',
    justifyContent: 'center'
  }
});
Next, install react-native-vector-icons for displaying icons:
npm install -S react-native-vector-icons
react-native link react-native-vector-icons
The link command connects the library's native dependencies to your project.
The Loading Component
We'll manage a loading state while the app fetches data. Update the App.js state to include an isLoading flag.
export default class App extends React.Component {
  state = {
    isLoading: true
  };

  render() {
    const { isLoading } = this.state;
    return (
      <View style={styles.container}>
        {isLoading ? <Text>Fetching The Weather</Text> : <Weather />}
      </View>
    );
  }
}
For now, we've added a placeholder <Weather /> component that will be rendered when isLoading is false.
The Weather Screen
Create a new component at ./components/Weather.js. This functional component will receive props and display the weather information. It will have a header for the icon and temperature, and a body for the weather condition title and subtitle.
// components/Weather.js
import React from 'react';
import { View, Text, StyleSheet } from 'react-native';
import Icon from 'react-native-vector-icons/MaterialCommunityIcons';

const Weather = ({ weather, temperature }) => {
  return (
    <View style={styles.weatherContainer}>
      <View style={styles.headerContainer}>
        <Icon size={48} name="weather-sunny" color={'#fff'} />
        <Text style={styles.tempText}>{temperature}˚</Text>
      </View>
      <View style={styles.bodyContainer}>
        <Text style={styles.title}>{weather}</Text>
        <Text style={styles.subtitle}>A simple weather app!</Text>
      </View>
    </View>
  );
};

const styles = StyleSheet.create({
  weatherContainer: {
    flex: 1,
    backgroundColor: '#f7b733'
  },
  headerContainer: {
    flex: 1,
    alignItems: 'center',
    justifyContent: 'center'
  },
  tempText: {
    fontSize: 48,
    color: '#fff'
  },
  bodyContainer: {
    flex: 2,
    alignItems: 'flex-start',
    justifyContent: 'flex-end',
    paddingLeft: 25,
    marginBottom: 40
  },
  title: {
    fontSize: 48,
    color: '#fff'
  },
  subtitle: {
    fontSize: 24,
    color: '#fff'
  }
});

export default Weather;
Fetching the Data
To manage the API key securely, create a file at ./utils/WeatherApiKey.js.
export const API_KEY = 'YOUR_API_KEY_HERE';
Replace YOUR_API_KEY_HERE with your actual OpenWeatherMap API key.
Now, let's fetch the data in App.js. We'll update the state to hold temperature, weather condition, and any errors. The data fetching logic will be placed in componentDidMount.
// In App.js
import { API_KEY } from './utils/WeatherApiKey';

// ...

export default class App extends React.Component {
    state = {
        isLoading: true,
        temperature: 0,
        weatherCondition: null,
        error: null
    };

    componentDidMount() {
        navigator.geolocation.getCurrentPosition(
            position => {
                this.fetchWeather(position.coords.latitude, position.coords.longitude);
            },
            error => {
                this.setState({
                    error: 'Error Getting Weather Conditions'
                });
            }
        );
    }

    fetchWeather(lat, lon) {
        fetch(
            `http://api.openweathermap.org/data/2.5/weather?lat=${lat}&lon=${lon}&APPID=${API_KEY}&units=metric`
        )
        .then(res => res.json())
        .then(json => {
            this.setState({
                temperature: json.main.temp,
                weatherCondition: json.weather[0].main,
                isLoading: false
            });
        });
    }

    render() {
        const { isLoading, weatherCondition, temperature, error } = this.state;
        return (
            <View style={styles.container}>
                {isLoading ? (
                    <Text>Fetching The Weather</Text>
                ) : (
                    <Weather weather={weatherCondition} temperature={temperature} />
                )}
            </View>
        );
    }
}
The fetchWeather function calls the OpenWeatherMap API with the device's coordinates and updates the component's state with the temperature and weather condition.
Dynamic Weather Conditions
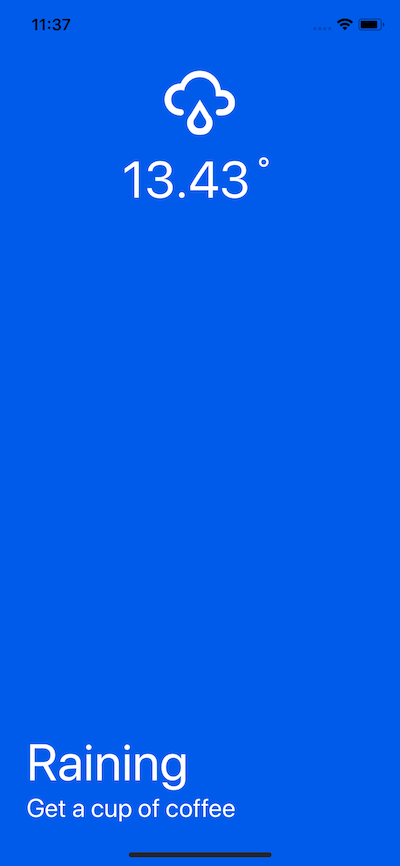
To make the UI dynamic, we can create a mapping of weather conditions to specific UI properties like colors, titles, and icons. Create a new file at ./utils/WeatherConditions.js:
// utils/WeatherConditions.js
export const weatherConditions = {
  Rain: {
    color: '#005BEA',
    title: 'Raining',
    subtitle: 'Get a cup of coffee',
    icon: 'weather-rainy'
  },
  Clear: {
    color: '#f7b733',
    title: 'So Sunny',
    subtitle: 'It is hurting my eyes',
    icon: 'weather-sunny'
  },
  Thunderstorm: {
    color: '#616161',
    title: 'A Storm is coming',
    subtitle: 'Because Gods are angry',
    icon: 'weather-lightning'
  },
  Clouds: {
    color: '#1F1C2C',
    title: 'Clouds',
    subtitle: 'Everywhere',
    icon: 'weather-cloudy'
  },
  // ... add other conditions as needed
};
Now, update the Weather.js component to use this mapping to dynamically render its UI based on the weather prop.
// components/Weather.js
import React from 'react';
import { View, Text, StyleSheet } from 'react-native';
import Icon from 'react-native-vector-icons/MaterialCommunityIcons';
import { weatherConditions } from '../utils/WeatherConditions';

const Weather = ({ weather, temperature }) => {
  if (weatherConditions[weather]) {
    return (
      <View
        style={[
          styles.weatherContainer,
          { backgroundColor: weatherConditions[weather].color }
        ]}
      >
        <View style={styles.headerContainer}>
          <Icon
            size={72}
            name={weatherConditions[weather].icon}
            color={'#fff'}
          />
          <Text style={styles.tempText}>{temperature}˚</Text>
        </View>
        <View style={styles.bodyContainer}>
          <Text style={styles.title}>{weatherConditions[weather].title}</Text>
          <Text style={styles.subtitle}>
            {weatherConditions[weather].subtitle}
          </Text>
        </View>
      </View>
    );
  } else {
      return (
          <View>
              <Text>Unknown Weather Condition</Text>
          </View>
      )
  }
};

// ... styles remain the same
export default Weather;
This change allows the Weather component to display a different background color, icon, and text for each weather condition received from the API.
Conclusion
This tutorial demonstrated how to leverage geolocation data and manage permissions to build a real-time weather forecast application using React Native and a third-party API. The fundamental concepts of fetching location data, handling permissions, and making API requests are essential for many mobile applications.