React Native: Building a Minimalist Weather App using Expo XDE (Archived)
Note: This article was published in 2018 and is now outdated.
This tutorial uses Expo XDE, which has been deprecated and replaced by Expo CLI. The concepts for building the application are still relevant, but the setup and development workflow have changed significantly. This content is preserved for historical purposes. For current Expo development practices, please refer to the official Expo documentation.
This article demonstrates the process of building a minimalist weather application using React Native and fetching real-time data from an API. It serves as a historical example of early Expo development workflows.
Original Requirements (2018)
- Familiarity with JavaScript and React.
- Node.js installed.
- Expo XDE (now deprecated).
Getting Started with Expo XDE
Expo XDE was a desktop application that provided a graphical user interface for creating and running Expo projects. The process involved creating a new project, which would then install dependencies using the React Native packager.

Once the project was initialized, the application could be started in a simulator or on a physical device using the Expo client app. The Metro Bundler would run in the background, enabling features like live reloading.
The root of the application was the App.js file, which rendered the main component.
Prototyping the UI
The initial development involved setting up a loading state and creating a static prototype of the weather screen.
A state variable isLoading was used to conditionally render a loading message or the main Weather component.
// App.js
export default class App extends React.Component {
  state = {
    isLoading: true
  };

  render() {
    const { isLoading } = this.state;
    return (
      <View style={styles.container}>
        {isLoading ? (
          <Text>Fetching The Weather</Text>
        ) : (
          <Weather />
        )}
      </View>
    );
  }
}
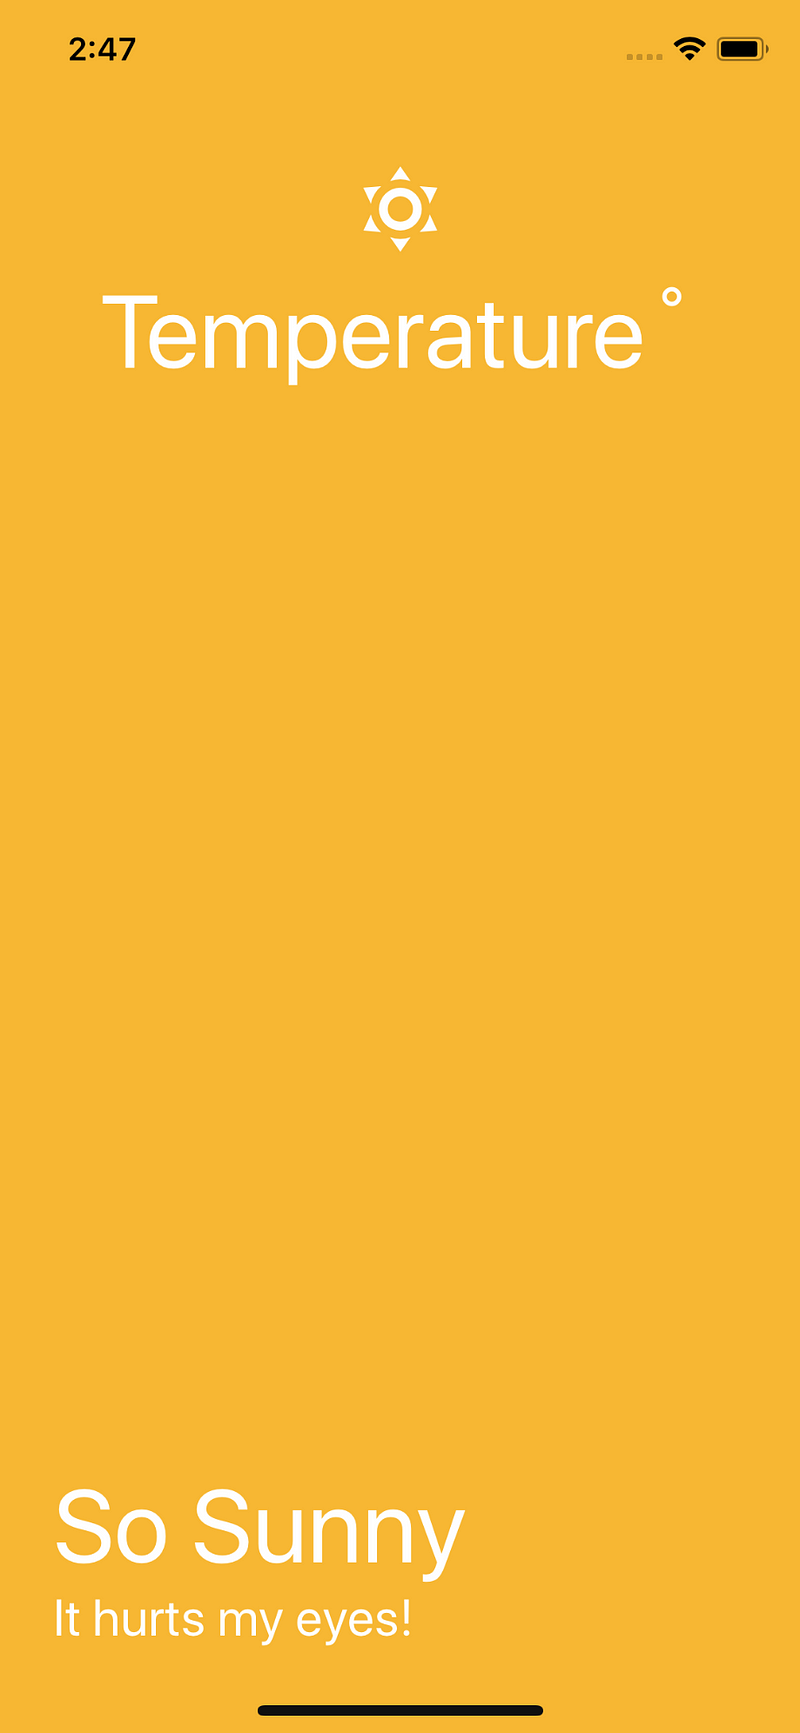
The Weather component was created in a separate file (./components/Weather.js) to display the UI, which was divided into a header (for the icon and temperature) and a body (for the title and subtitle).
// components/Weather.js
import React from 'react';
import { View, Text, StyleSheet } from 'react-native';
import { MaterialCommunityIcons } from '@expo/vector-icons';

const Weather = () => {
  return (
    <View style={styles.weatherContainer}>
      <View style={styles.headerContainer}>
        <MaterialCommunityIcons size={48} name="weather-sunny" color={'#fff'} />
        <Text style={styles.tempText}>Temperature˚</Text>
      </View>
      <View style={styles.bodyContainer}>
        <Text style={styles.title}>So Sunny</Text>
        <Text style={styles.subtitle}>It hurts my eyes!</Text>
      </View>
    </View>
  );
};
// ...styles
export default Weather;
Fetching Data from an API
To fetch real-time weather data, the OpenWeatherMap API was used. This required obtaining an API key and storing it within the application.
The application used the browser's navigator.geolocation API to get the device's current latitude and longitude. These coordinates were then sent to the OpenWeatherMap API.
The componentDidMount lifecycle method was used to fetch the location and then the weather data.
// App.js
componentDidMount() {
  navigator.geolocation.getCurrentPosition(
    position => {
      this.fetchWeather(position.coords.latitude, position.coords.longitude);
    },
    error => {
      this.setState({
        error: 'Error Getting Weather Conditions'
      });
    }
  );
}

fetchWeather(lat, lon) {
  fetch(
    `http://api.openweathermap.org/data/2.5/weather?lat=${lat}&lon=${lon}&APPID=${API_KEY}&units=metric`
  )
  .then(res => res.json())
  .then(json => {
    this.setState({
      temperature: json.main.temp,
      weatherCondition: json.weather[0].main,
      isLoading: false
    });
  });
}
The fetched temperature and weatherCondition were then passed as props to the Weather component.
Creating a Dynamic UI
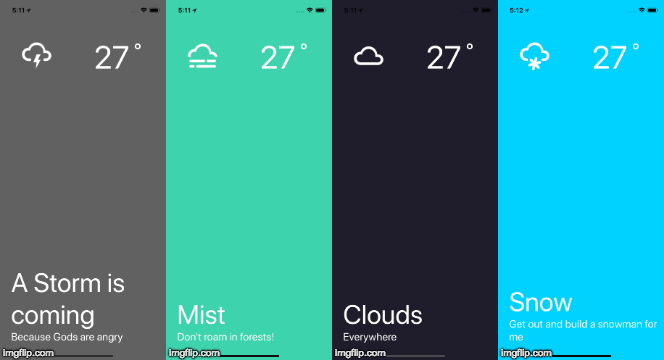
To make the UI dynamic, a mapping object was created to associate different weather conditions with specific colors, titles, subtitles, and icons.
// utils/WeatherConditions.js
export const weatherConditions = {
  Rain: {
    color: '#005BEA',
    title: 'Raining',
    subtitle: 'Get a cup of coffee',
    icon: 'weather-rainy'
  },
  Clear: {
    color: '#f7b733',
    title: 'So Sunny',
    subtitle: 'It is hurting my eyes',
    icon: 'weather-sunny'
  },
  // ... other conditions
};
The Weather component was updated to use this weatherConditions object to render its UI based on the weather prop it received.
// components/Weather.js
const Weather = ({ weather, temperature }) => {
  return (
    <View
      style={[
        styles.weatherContainer,
        { backgroundColor: weatherConditions[weather].color }
      ]}
    >
      <View style={styles.headerContainer}>
        <MaterialCommunityIcons
          size={72}
          name={weatherConditions[weather].icon}
          color={'#fff'}
        />
        <Text style={styles.tempText}>{temperature}˚</Text>
      </View>
      <View style={styles.bodyContainer}>
        <Text style={styles.title}>{weatherConditions[weather].title}</Text>
        <Text style={styles.subtitle}>
          {weatherConditions[weather].subtitle}
        </Text>
      </View>
    </View>
  );
};
This resulted in a dynamic application that changed its appearance based on the current weather conditions.
Conclusion
This project served as a demonstration of building a simple, data-driven mobile application with React Native and Expo during its earlier stages. While the tools have evolved, the core principles of component-based UI, state management, and API integration remain fundamental to modern React Native development.